
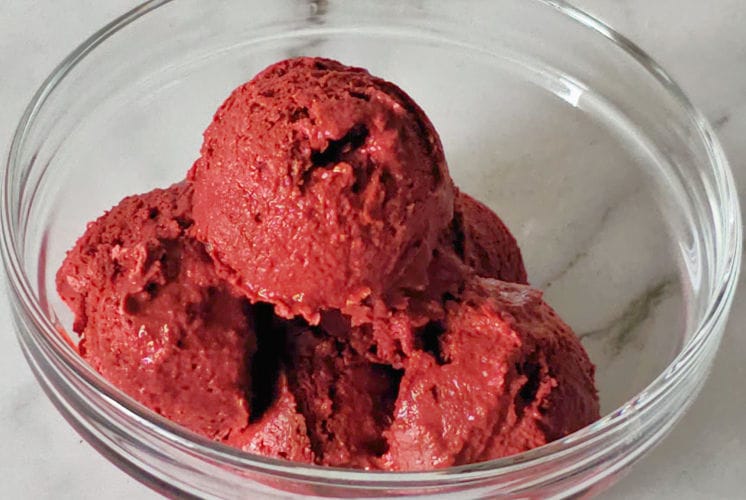
Have you had red velvet ice cream before? If so, where did you eat it? How was it? I certainly recommend taking out your ice cream maker and making this homemade red velvet ice cream for Valentine’s Day.
Although you can buy it from any store, it will not taste as good as this handmade recipe. This is creamy and rich, with a perfect balance of vanilla, and chocolate.
To make this red velvet ice cream, you only need seven simple ingredients. Isn’t it fabulous? The best part is that it is quick and simple to prepare, taking only 10 to 15 minutes. Please keep in mind that this does not include freezing time:).
Why will you love red velvet ice cream?

- Creamy, rich, and perfect balance of flavors.
- Can be turned into a vegan and sugar-free recipe.
- Extremely easy to make.
- Make ahead ice cream base.
- Requires just 7 ingredients.
How to make red velvet ice cream?
Before we go into the step-by-step instructions, let’s have a look at the recipe in general.
| Sr. No. | Steps |
| 1. | Combine all of the ingredients into a saucepan. |
| 2. | Heat on low to medium flame until it is simmering. |
| 3. | Freeze ice cream base for 2 hours. |
| 4. | Churn the ice cream into ice cream maker. |
| 5. | Freeze, scoop and serve. |
Red velvet ice cream ingredients
This homemade red velvet ice cream just contains 7 simple ingredients. The exact quantity is given in the recipe card below.

- Whipping cream – Also known as heavy cream, heavy whipping cream, or double cream (in certain parts of the world), heavy cream adds richness to our red velvet ice cream. Check out the substitutions for a vegan or dairy-free version.
- Whole milk – For this recipe, use full-fat milk to ensure it’s creamy. I would not recommend replacing it with 2% or skim milk because it may result in ice cream with ice crystals, which we do not want. right?
- Cocoa Powder – We will only need a small amount to provide a hint of chocolate flavor to our handmade red velvet ice cream. Use either natural cocoa powder or Dutch-processed cocoa powder, depending on what you have in the pantry.
- Granulated sugar – This is used for sweetness, of course. This is also referred to as caster sugar and is readily available in any grocery store.
- Vanilla extract – This adds a pleasant vanilla aroma to the ice cream. Use pure vanilla extract or vanilla bean paste, anything will do. Avoid using vanilla imitation because it will not provide the same depth of taste.
- Salt – As I always say, salt will enhance the taste of your dessert so, don’t skip it please. We will need just a tiny pinch.
- Red food color – I strongly advise using gel food color for this recipe. It is acceptable to use regular liquid food coloring, but you will need far more than gel, and may spoil the taste.
Any substitute?
- Vegan or dairy-free – Replace heavy whipping cream and whole milk with coconut milk. To make it creamy, mix in a small amount of xanthan gum or milk powder. I’ve listed the quantities in different variations below.
- Sugar-free – Replace sugar with monk-fruit sweetener in exact quantity as regular sugar.
Tools needed
- Saucepan
- Measuring cups and measuring spoons
- Whisk
- Glass container
- Ice cream maker
- Ice cream scoop
- Ice cream cones (optional)
Red velvet ice cream (step-by-step) recipe
So, now you have all of the ingredients ready, let’s prepare it step-by-step. At first, keep your ice cream bowl in the freezer for a minimum of 12 hours.

- Sift cocoa powder into the saucepan to get rid of any lumps.

- Add the remaining ingredients into the saucepan and mix it with a whisk until smooth.

- Heat over low flame for 5 minutes, Stirring often, until the sugar is fully dissolved and the mixture is simmering. Now, our ice cream base is ready.

- Transfer the base to a freezer-safe bowl.

- Cover the bowl with plastic wrap and freeze it anywhere between 2 to 24 hours. Refer to storing instructions if you are planning to make in advance. The longer you chill it, the more tasty the ice cream will become.

- When you are ready to make the ice cream (i.e. once your ice cream bowl is chilled enough), add the ice cream base into the ice cream bowl.

- Start churning according to the manufacturer’s instructions. Our ice cream maker usually takes 1 hour to churn. If you have a KitchenAid mixer, try making the ice cream using the KitchenAid ice cream attachment or a Cuisinart ice cream maker is good, too.

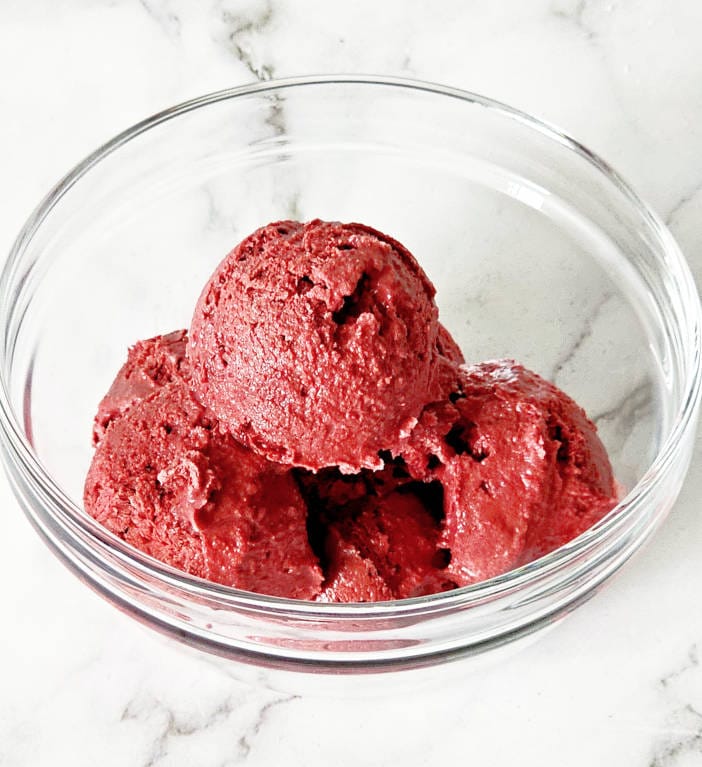
- Transfer the soft ice cream into a glass bowl and cover it with plastic wrap. If you are ok with the soft-serve version, serve this immediately.

- Freeze it for 2 hours, then scoop it using an ice cream scoop. Serve immediately. Enjoy!
How to serve?
This red velvet ice cream tastes best as itself, but you can add any toppings you like. Here are some of my recommendations.
- White chocolate – Red velvet pairs nicely with white chocolate. Add white chocolate chips after churning the ice cream or as a topping. Alternatively, drizzle melted white chocolate on top just before serving.
- Cream cheese frosting – Red velvet and cream cheese frosting go hand in hand. After churning, add 1/4 cup cream cheese icing and freeze. Add a tablespoon of cream cheese frosting to a glass jar and swirl it around, just like I did with my marble loaf cake.
Watch me making (video)
Storing and freezing instructions for red velvet ice cream recipe
Although this is ice cream, you can store it in either the refrigerator or the freezer.
Storing instructions
You can store the ice cream base in the refrigerator for up to one week.
Freezing instructions
Freezing ice cream base –
Transfer the heated mixture into the glass bowl and pop it in the freezer once it is cooled down to room temperature. It stays ok for up to 3 months.
Freezing ice cream
Once the ice cream is churned, transfer the soft ice cream into the glass bowl. For additional protection from ice crystal formation, add a layer of plastic wrap, followed by aluminum foil such that it touches the ice cream from the top.
You must freeze it for at least 2 hours before serving. It stays ok for up to 1 month. Check out the variations to increase its shelf life.
While serving, simply scoop it with an ice cream scoop and serve immediately. It will be simple to scoop on the first day, but after that it will harden. Simply microwave the container for 7 to 10 seconds, and you’re good to go.
In short,
| Sr. No. | Ice cream base / ice cream | Storing Type | Weeks/Months |
| 1. | Ice cream base | Refrigerator | 1 week |
| 2. | Ice cream base | Freezer | 3 months |
| 3. | Ice cream | Freezer | 1 month |
Variations
To make it more creamy, you can add xanthan gum or milk powder.
- Xanthan gum – It works as a stabilizer and extends the shelf life of your ice cream. It is added to store-bought ice cream too. It will also improve the texture and creaminess of the ice cream. But don’t add too much otherwise, it will ruin the taste of ice cream. Use 1/4 teaspoon along with the rest of the ingredients.
- Milk powder – This will improve the creaminess of the ice cream. Use 2 teaspoons with the other ingredients.
In either case, mix it with sugar first and then gradually add milk and cream to prevent clumping. If you still have clumps, filter them through a fine strainer after the ice cream base has been cooked.
Secret tips to make red velvet ice cream recipe
- Freeze after churning – Ice cream will have a soft-serve consistency after churning. So, I recommend freezing it for at least 2 hours to get a perfect scoop.
- Freeze ice cream bowl – Freeze the ice cream bowl at least 12 hours before making or churning the ice cream. To achieve the greatest results, it needs to be fully chilled. Different ice makers will have different directions, so double-check them once.
- Heat on low flame – We need to completely dissolve the sugar, therefore heat the mixture on low heat. If you warm it over medium or high heat, it will simmer without dissolving the sugar.
FAQ’s
Can I make this red velvet ice cream ahead of time?
Absolutely, The ice cream can be prepared ahead of time and stored for up to a month. Alternatively, you can keep the ice cream foundation for up to three months. Churn and freeze on the day of serving.
How can I make this red velvet ice cream without ice cream maker?
Mix all of the ingredients and cook over low heat until the sugar is completely dissolved. Freeze this mixture for at least 24 hours. Every 4 hours, remove it from the freezer and place it in the mixer to break up the ice crystals. Repeat 3-4 times and serve.
Why does my homemade red velvet ice cream have ice crystals?
If you use an ice cream maker, churn it according to the manufacturer’s instructions and cover it with plastic wrap before freezing. If you aren’t using an ice cream maker, run it through the mixer every 4 hours to get rid of ice crystals.
In case of any further questions, please feel free to drop a comment below and I will be happy to answer them :).
Want to try some other valentines desserts?
- Red velvet funnel cake recipe.
- Starbucks red velvet loaf recipe.
- Red velvet crumble cookies.
- Red velvet cake with cream cheese frosting.
Did you make it?
Have you made it yet? If not, then what are you waiting for? Make this homemade red velvet ice cream for Valentine’s Day and share it your loved ones.
Do not forget to leave your thoughts in the comments section below.I genuinely enjoy hearing from you, and your input is really important to me.
If you share the red velvet ice cream recipe on Instagram, tag @DessertKatta and use the hashtag #DessertKatta.
Happy Valentine’s Day!
Recipe card
Easy Red Velvet Ice Cream
Description
Make red velvet ice cream using only 7 easy ingredients. This has the perfect combination of vanilla, a subtle flavor of chocolate, and a gorgeous red color. Let's get started.
Ingredients
Recipe
- Keep your ice cream bowl in the freezer for a minimum of 12 hours.
- Sift cocoa powder into the saucepan to get rid of any lumps.

- Add the remaining ingredients into the saucepan and mix it with a whisk until smooth.
- Heat over low flame for 5 minutes, Stirring often, until the sugar is fully dissolved and the mixture is simmering. Now, our ice cream base is ready.
Transfer the base to a glass bowl.
Cover the pan with cling wrap and freeze it anywhere between 2 to 24 hours. Refer to storing instructions if you are planning to make in advance. The longer you chill it, the more tasty the ice cream will become.
When you are ready to make the ice cream (i.e. once your ice cream bowl is chilled enough), add the ice cream base into the ice cream bowl.
Start churning according to the instructions given by the manufacturer. We have this ice cream maker and it usually takes 1 hour to churn. If you have a KitchenAid mixer, try doing the ice cream using the KitchenAid ice cream attachment, or Cuisinart ice cream maker is good too.
- Transfer the soft ice cream into a glass bowl and cover it with plastic wrap. If you are ok with the soft-serve version, serve this immediately.
Freeze it for 2 hours, then scoop it using an ice cream scoop. Serve immediately. Enjoy!

Yummy 😋