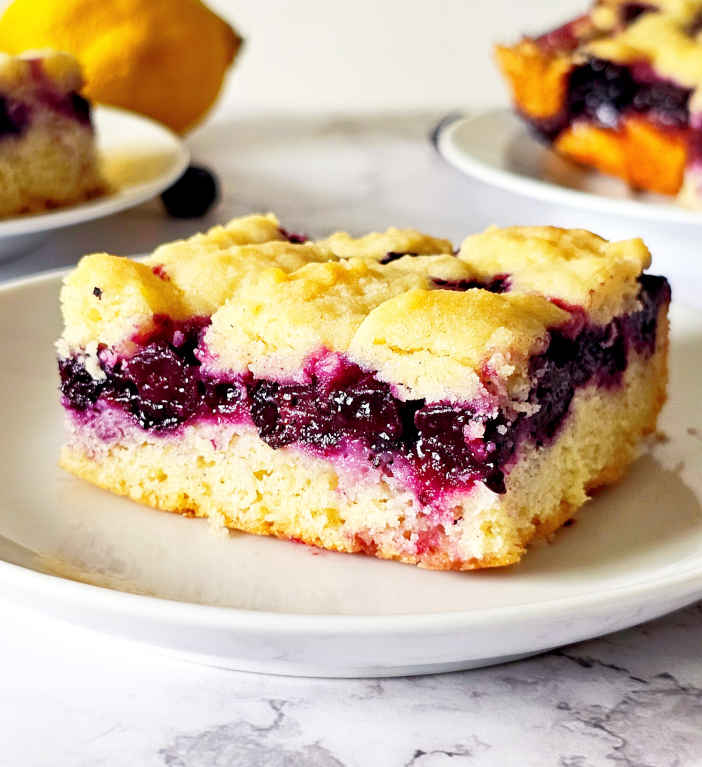
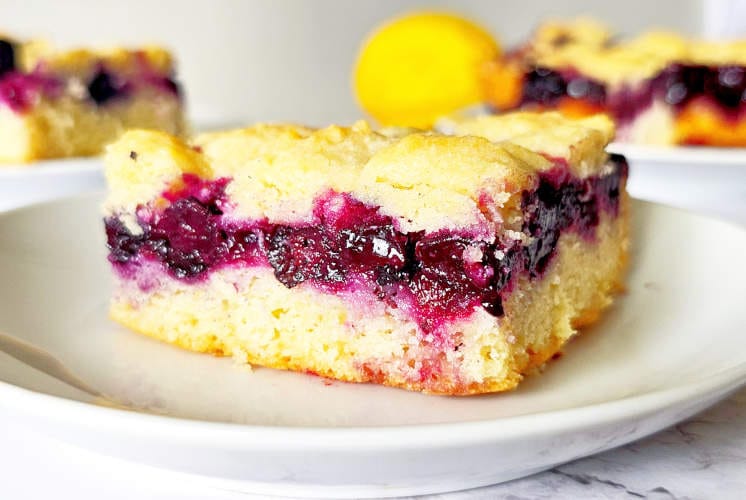
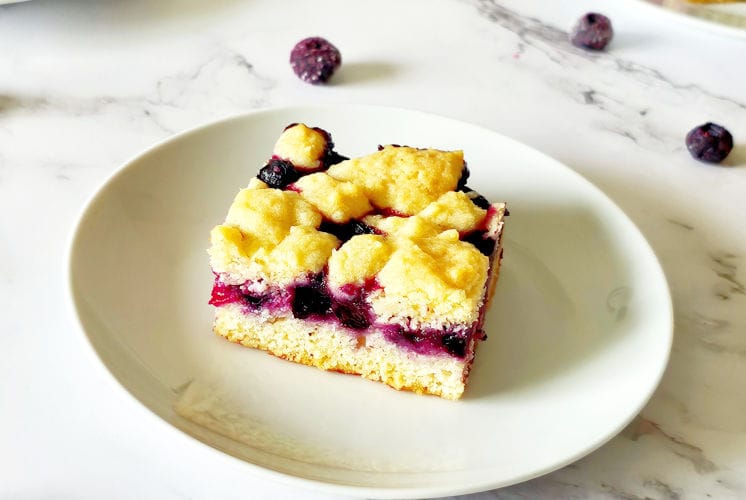
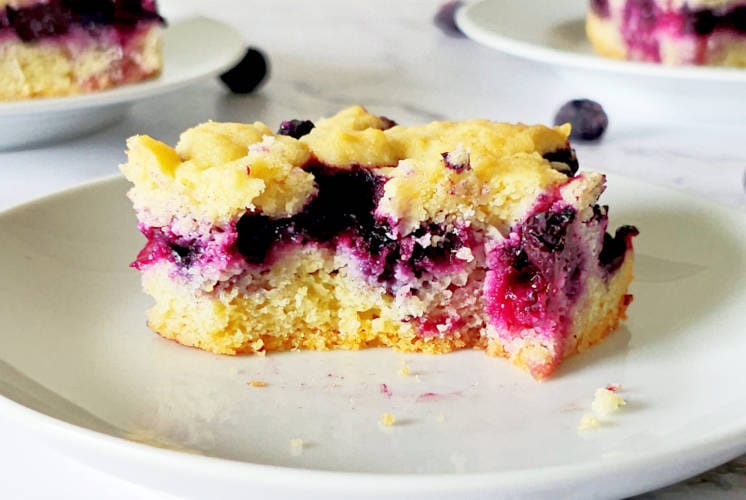
If you’re looking for a dessert that’s bright, fruity, and super easy to make, these lemon blueberry bars are your friend! They start with a buttery, melt-in-your-mouth crust, topped with a luscious, juicy blueberry filling.
I love making them when I want something that looks attractive and comes together quickly with basic pantry ingredients.
Trust me, once you try these, they’ll be on repeat all year long. let's get into it.
Also, try my favorite lemon blueberry muffins.
Let's look at the overview before proceeding to the step-by-step recipe.
| Sr. No. | Steps |
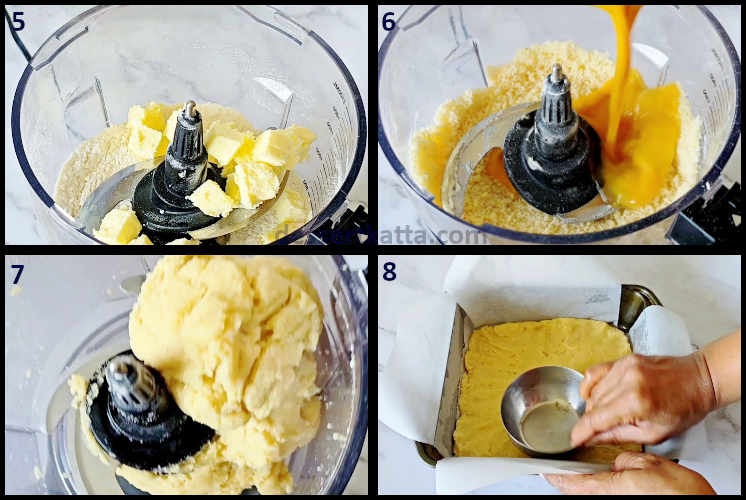
| 1. | Combine all the ingredients and make a dough. |
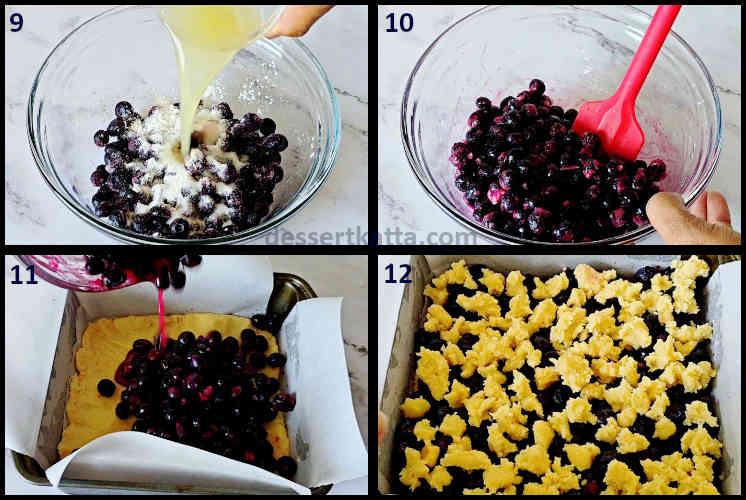
| 2. | Prepare blueberry mixture. |
| 3. | Layer dough and blueberry mixture. |
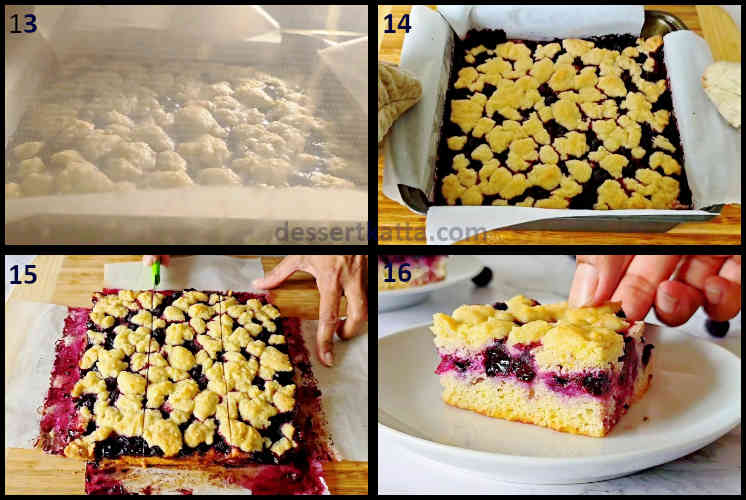
| 4. | Bake, cool, and serve. |
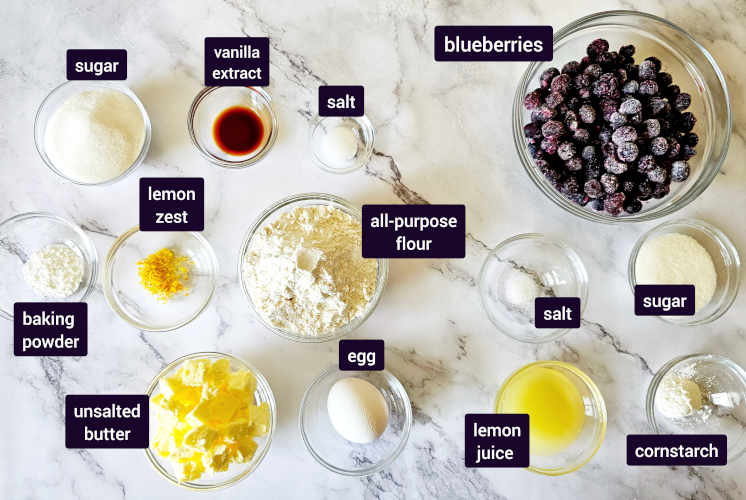
Vanilla extract - Just a splash is needed, but it will bring out the flavors. So, do not skip it please.
Egg - Eggs help bind everything together in the crust and give it that nice, smooth texture that sets just right after baking.
All-purpose flour - This is the base of our crust and filling, giving structure to the bars so they hold together perfectly without being too dense.
Baking powder - This helps the filling rise slightly, keeping it light and tender. Just a little is needed.
Sugar - This adds the sweetness, of course.
Salt - Just a little but don't skip it unless using salted water.
Unsalted butter - This is what makes the crust buttery, tender, and deliciously rich. It’s the secret to that melt-in-your-mouth texture. I like to make it with unsalted butter because I can control the amount of salt.
Lemon zest - Zest adds a punch of citrus aroma to the crust.
Blueberries - Star of the show. Use fresh or frozen, whatever is handy in your pantry.
Salt - Just a pinch, but do not skip it. It cuts the sweetness and balances the flavor.
Sugar - This adds the sweetness.
Lemon juice - Fresh lemon juice gives the bars their bright, tangy zing that bottled juice just can’t match.
Cornstarch - Very important ingredient. This helps to thicken our blueberry filling so that it is not too runny or too loose.
All-purpose flour - replace all-purpose flour with gluten flour. Just make sure it is 1:1 substitute.

However you serve them, these lemon blueberry bars are always a hit.
By any chance, if you have leftovers (because I never had any leftovers) or if you’re planning ahead of time, follow my instructions for storing and freezing.
Once the bars have completely cooled and set, place them into an airtight container.
I usually layer them with a parchment paper in between to keep them from sticking together.
Store them in the fridge, and they’ll stay fresh and delicious for up to 5 days. Honestly, I think they taste even better the next day after the flavors have popped up!
If you are making ahead of time, these bars freeze beautifully!
After they’ve cooled and been cut, lay them out on a baking sheet and freeze them for about an hour (this helps keep their shape).
Then transfer them to a freezer-safe container or zip-top bag with parchment between the layers.
They’ll keep well for up to 2 months.
When you’re ready to enjoy them, just take out however many you need and let them thaw in the fridge for a few hours or overnight.
If you are in a hurry, you can let them sit on the kitchen counter for about 30 minutes. Just make sure they’re not sitting in a warm spot (or near gas) for too long.
One of my favorite things about this recipe is how easy it is to switch things up depending on what you have on hand or what you’re craving.
Use fresh lemon - I know sometimes it is easier to use store-bought lemon juice, but let me tell you, it is the fresh lemons that make all the difference.
Firmly press the dough - When pressing the dough into the pan, use a flat-bottom pot or the bottom of a measuring cup to get a smooth, firm base. It helps hold everything together when you cut the bars.
Serve them cold - These bars are delicious when served cold. They taste very refreshing, and exactly the right balance of tartness and sweetness. I always store them in the fridge until just before serving, as these are usually referred to as a summer treat.
Do not cut when warm - I know it’s hard to wait (been there myself :)), but I would highly recommend chilling the bars for at least 2–3 hours before slicing, as it makes a huge difference. They firm up perfectly, so you get nice, clean edges and no mess.
Use a warm, sharp knife - For those picture-perfect cuts, run your knife under warm water and wipe it with a tissue between slices. It’s a tiny extra step, but worth it if you want neat, bakery-style bars.
If you have any further questions, please feel free to drop a comment below, and I will be happy to answer them.
I’d love to hear what you think about these lemon blueberry bars! Did you try the recipe? Let's chat in the comments.
Have you put your spin on it or added a fun twist? Drop a comment below and share your thoughts, tips, or questions—I’m always excited to hear how you make this recipe your own.
If you post the lemon blueberry bars on Instagram, please tag me. Tag @DessertKatta or use the hashtag #DessertKatta or #dessertkattarecipes.
Baking’s more fun when we swap ideas, so don’t be shy! 😊🍋🫐
These lemon blueberry bars are one of my all-time favorite bakes, especially when I want something that feels light, fresh, and a little bit fancy (but secretly super easy to make!). Let's start baking them!
Thank you for visiting DessertKatta. Please follow Dessert Katta for more dessert recipes by Sayali Bhave.


