This recipe is for every chocolate lover out there :). There is nothing more satisfying than making your homemade chocolate pudding. This recipe is simple, extremely creamy, and bursting with chocolate flavors.
Chocolate pudding is the most common and popular pudding among all ages. This homemade pudding is made with pure chocolate and thickened with egg yolks. So, you have landed at the correct place, if you are looking for a chocolate pudding recipe that does not use cocoa powder for chocolate flavor.
I can assure you that this homemade pudding is far better compared to store-bought because, first, it is prepared fresh and contains no preservatives, you can make it ahead of time and store it in the refrigerator or freezer. And second, it is cheaper than store-bought pudding.
I have made this recipe by tweaking my favorite vanilla pudding recipe. Me and my son could indulge in that pudding for hours and hours. I encourage you to make if you have not already. I am pretty confident that this chocolate pudding will not disappoint you either. Here are the reasons:
Let us see what we need to make this delicious chocolate treat. Make sure to check the recipe card for a full list of ingredients and quantities.
You can tweak in the ingredients and make different variations.
Dairy-free chocolate pudding- To make the dairy-free pudding, use daily free butter along with soy milk or any nut milk. I would not recommend coconut milk as it would change the taste of the chocolate pudding.
Sugar-free chocolate pudding - You can replace sugar with an exact amount of sugar-free alternative. So, you need a sugar-free solution that is an exact replacement or is easily dissolvable. I recommend using Allulose or monk fruit sweetener made with erythritol.
Milk - I do not recommend replacing full-fat milk with 2% milk as it will change the taste. However, if you want to make a richer and creamier version, you can replace 1/4th quantity of milk with heavy cream but do so after adding the chocolate and cook on low flame.
Chocolate - I have used semi-sweet chocolate chips in this recipe. You can easily replace it with milk chocolate or dark chocolate. I would not suggest using white chocolate as it would be too sweet. To include white chocolate in this recipe, we will need to make changes to other ingredients.
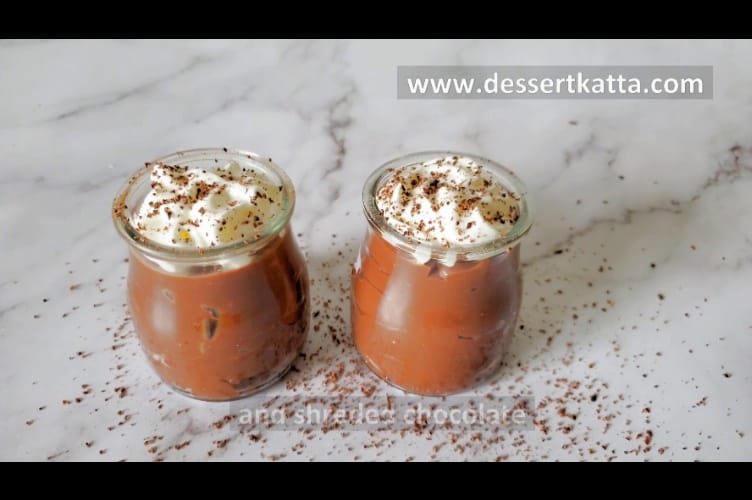
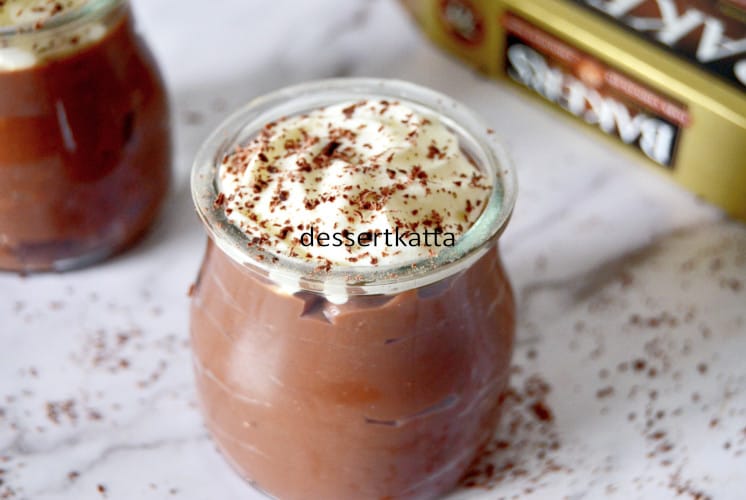
Here are a few suggestions for decorating and serving your homemade chocolate pudding.
These are some of my favorites. Please let me know if you know any more 🙂.
You can follow this step-by-step process to make the best homemade chocolate pudding ever.


Do you really want to store? Do you really have any leftovers? I never have any 🙂. But if you want, you can make this ahead of time and store it in the refrigerator or freezer. Once it is prepared, transfer to any mixing bowl and cover with plastic wrap.
This is mandatory so that skin does not form on top. Skin will not get mixed properly with pudding again and ruin the texture.
Once it is cool to touch store in refrigerator and consume within 4 days. Store in freezer if you want to store more than that.
Follow the same instructions as refrigeration but use air tight container instead of mixing bowl. Once it is cooled down, you can freeze it.
You can freeze the pudding up to 1 or 1 and half months.
To thaw, keep the container overnight in refrigerator and you are all set. You may want to whip it a bit but it's completely optional.
If you love this homemade chocolate pudding try out my other recipes:
Please make this homemade chocolate pudding and let me know how this turns out for you in the comments! I honestly love to hear from you, and your feedback is really important to me.
If you post the chocolate pudding pictures on Instagram, do not forget to tag me. Tag @DessertKatta or use the hashtag #DessertKatta.
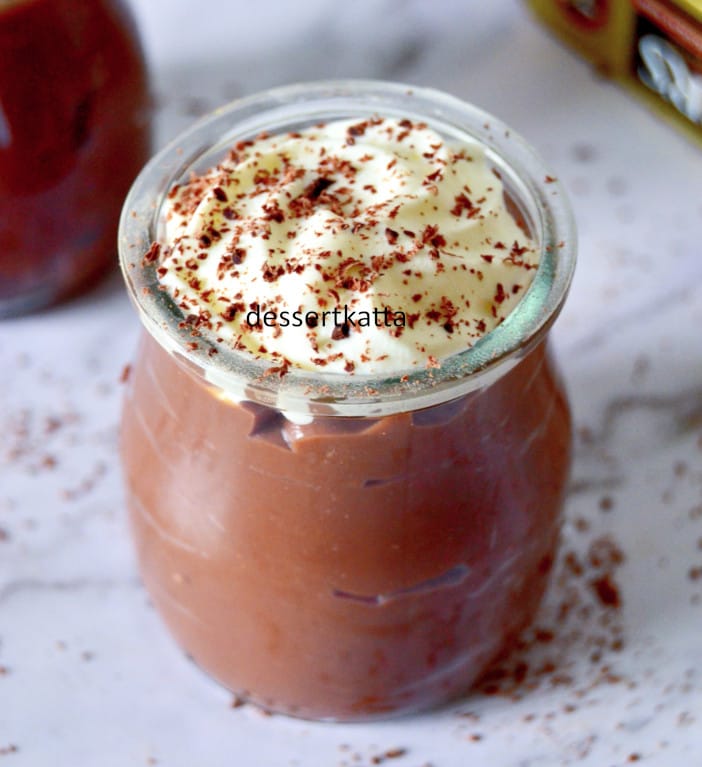
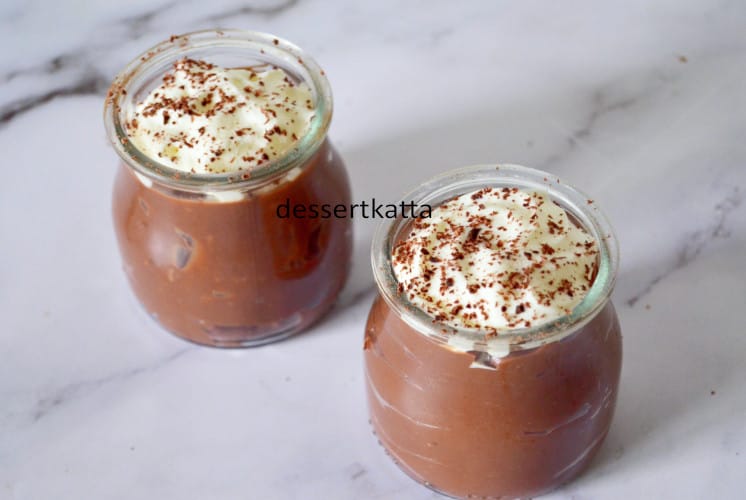
This homemade chocolate pudding is pure bliss. This handmade pudding is thick, and smooth with an intense chocolate flavor that comes from real chocolate. Do not search anymore and make this ultimate chocolate indulgence right away.
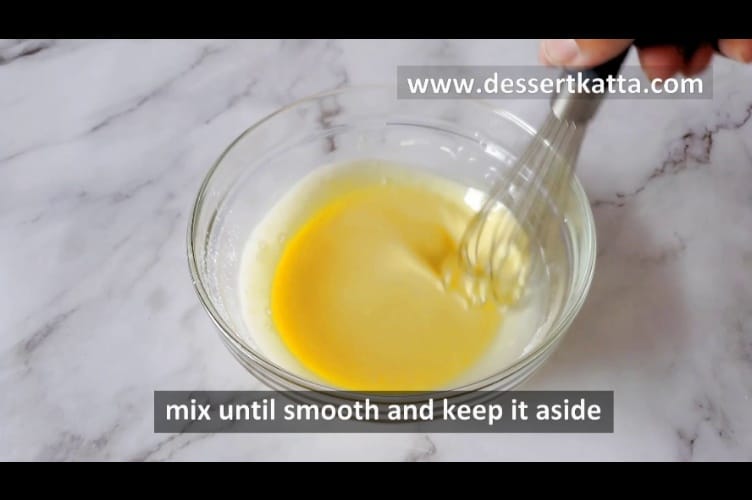
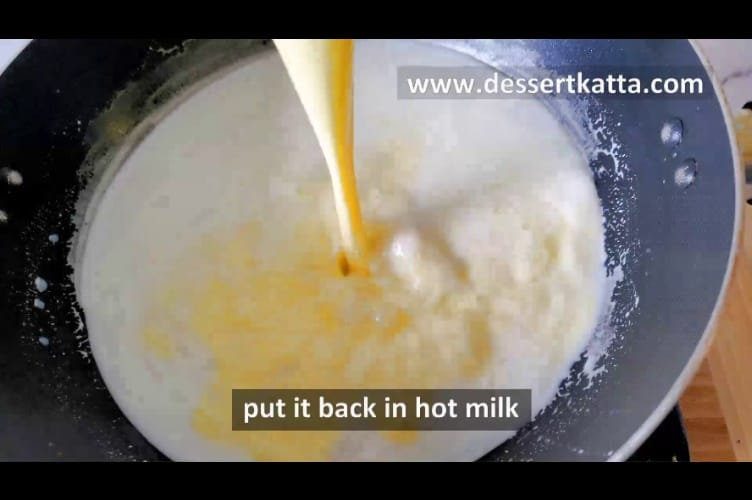
Mix egg yolks, cornstarch, and 1/4 cup of milk in a large bowl. Whisk to form a smooth paste. Set aside.Place 1+3/4 cup of milk and sugar in a big saucepan. Heat over medium heat, stirring to dissolve the sugar. Heat the mixture until it starts forming steam.The next step is to temper the eggs. Pour about ½ cup of the hot milk into the egg yolk mixture, whisking continuously.Transfer the tempered egg yolk mixture back into the saucepan.Start mixing. After 4 to 5 minutes, add the chocolate chips and cook the pudding mixture over medium heat until it starts to thicken. Make sure you are continuously mixing it and getting to the edges and the bottom of the saucepan. Otherwise, the pudding will stick to the bottom and burn. This whole process requires approximately 10 to 12 minutes.
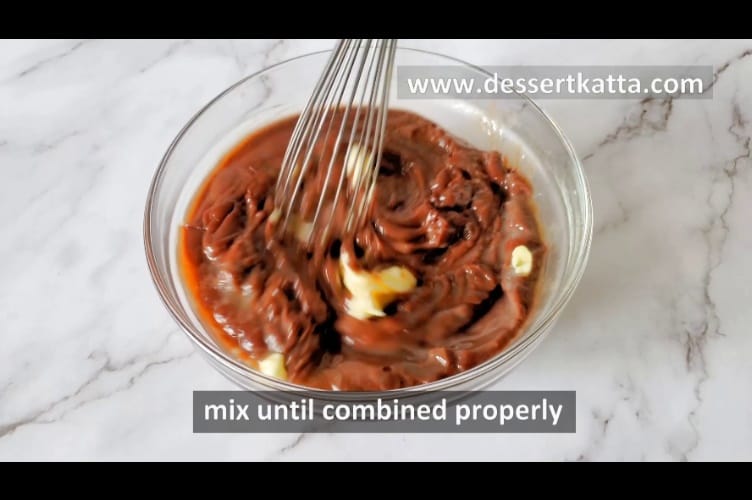
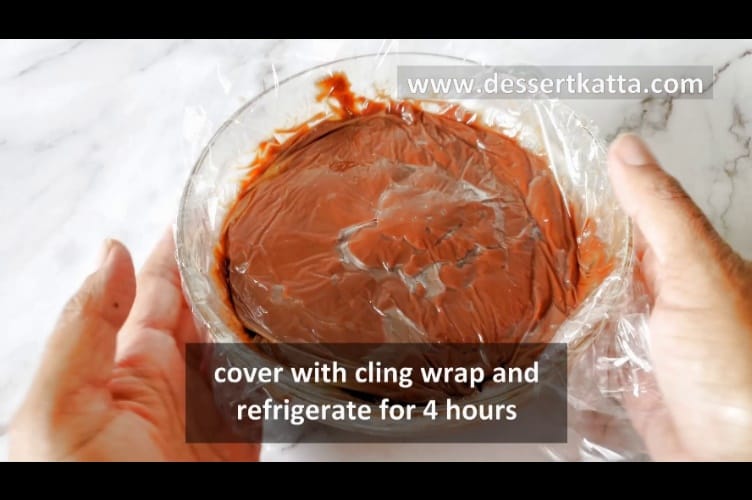
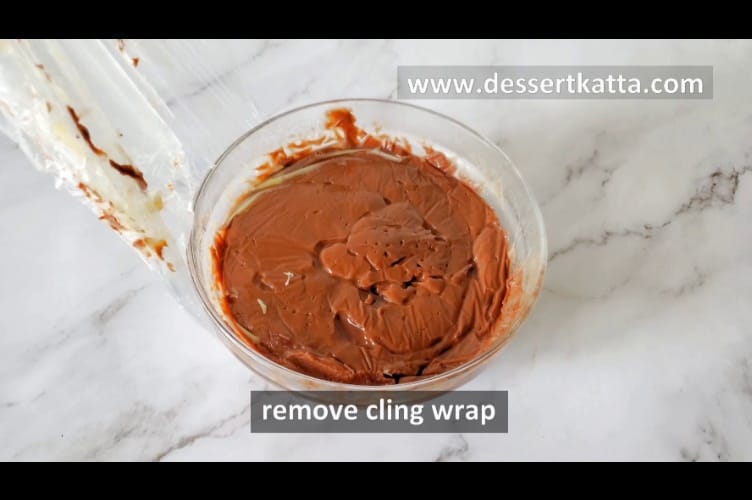
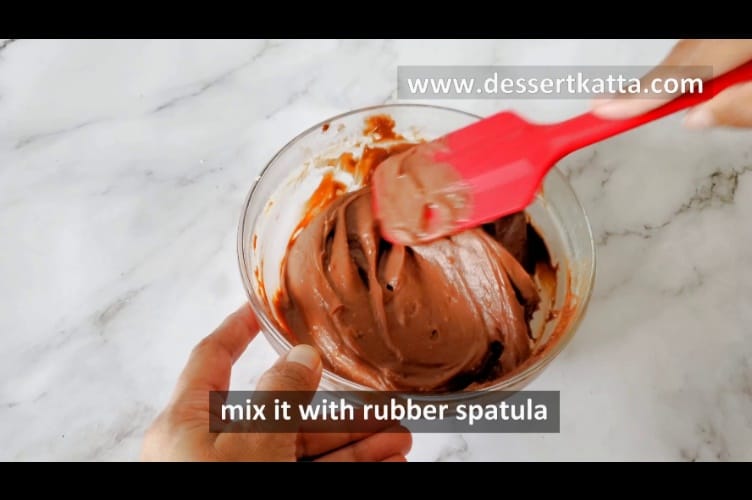
Remove the pudding from the heat and mix in the vanilla extract, softened butter, and salt. Mix until the butter completely is melted and mixed with the pudding, vanilla, and salt.Transfer the pudding to a large mixing bowl and cover it with plastic wrap. Please ensure that the plastic wrap touches the entire surface of the pudding to avoid skin formation.After refrigerating the pudding for 4 hours, remove the cling (plastic) wrap. If it has not been set completely, put it back in the refrigerator.Using a rubber spatula, mix the pudding again.Serve the pudding in individual bowls.Decorate with whipped cream and cocoa powder.Serve chilled and enjoy!Thank you for visiting DessertKatta. Please follow Dessert Katta for more dessert recipes by Sayali Bhave.


